SenseOfLayers

SignShell · add-in for Autodesk Fusion

Sign letters that print hollow, need no supports and click shut.

Type your text, pick a font and a size. SignShell builds every letter as a hollow shell with a matching snap-fit lid and mounting slots, then exports print-ready files with material, cost and time estimates.

USD 8.99 · Windows · Autodesk App Store

The word SIGNSHELL as dark green 3D letters made with SignShell

Built for printing, from the first sketch

Every letter comes out as two parts: the shell with the face and side walls, and a lid that closes the back. The details are designed for an FDM printer, not added afterwards.

Snap fit, no glue

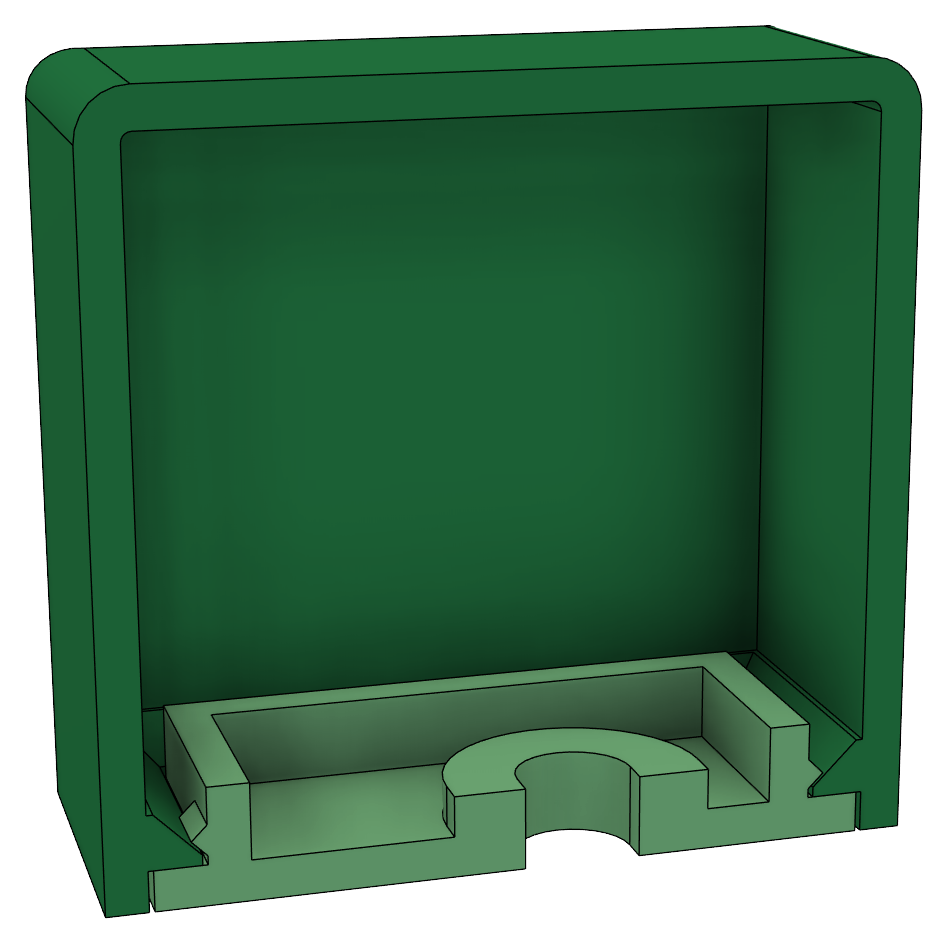
A ledge inside the shell stops the lid at the right depth. Small bumps on the lid's rib click in behind it.

snap depth 0.4 mm, adjustable

No supports

Shells print face down and lids flat side down. Every overhang, the ledge included, stays at 45°.

max. overhang 45°

Mounting slots

Screw the lids to the wall, then click the letters on. The slots let you adjust before tightening.

4 mm screws · ±3 mm travel

Walls in whole lines

Enter your nozzle and SignShell rounds the wall to a whole number of extrusion lines.

1.5 → 1.6 mm (4 × 0.4 mm)

Real letter height

The size you enter is the actual height of a capital letter, whatever the font.

measured on the letter H

Cost and print time

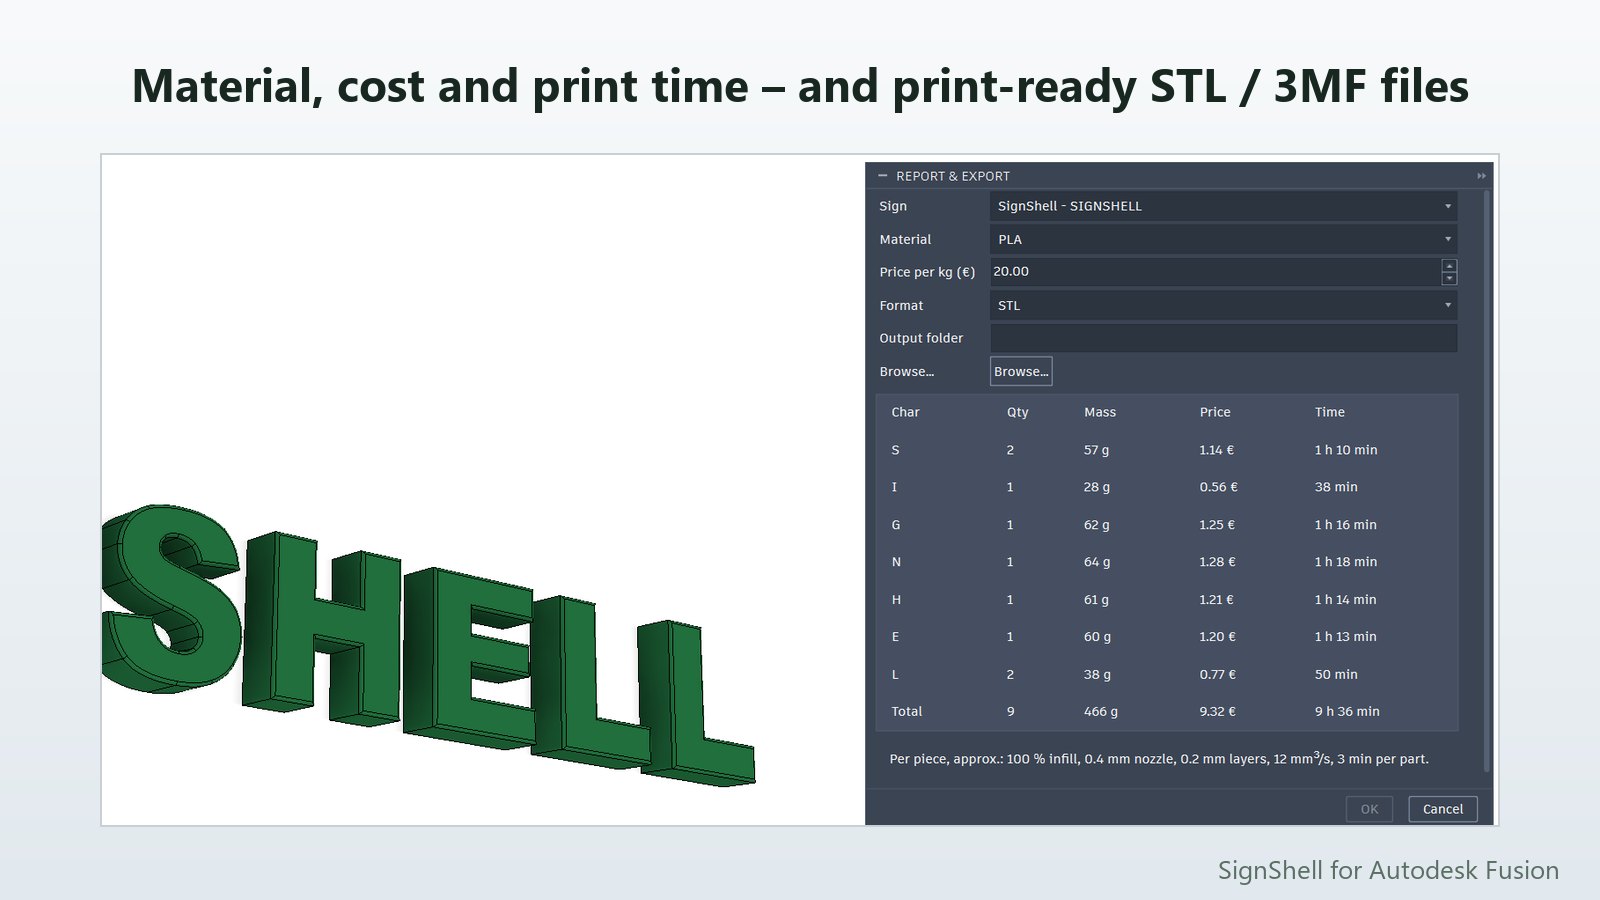
Mass, price and print time per letter and for the whole sign, in PLA, PETG, ASA or ABS.

STL or 3MF + CSV report

A shell and a lid for every letter

The shell is open at the back. The lid has a rib that follows the outline, snap bumps along the straight stretches and two slotted screw holes with reinforced bosses.

Repeated letters are built once and reused, so long signs stay quick to make.
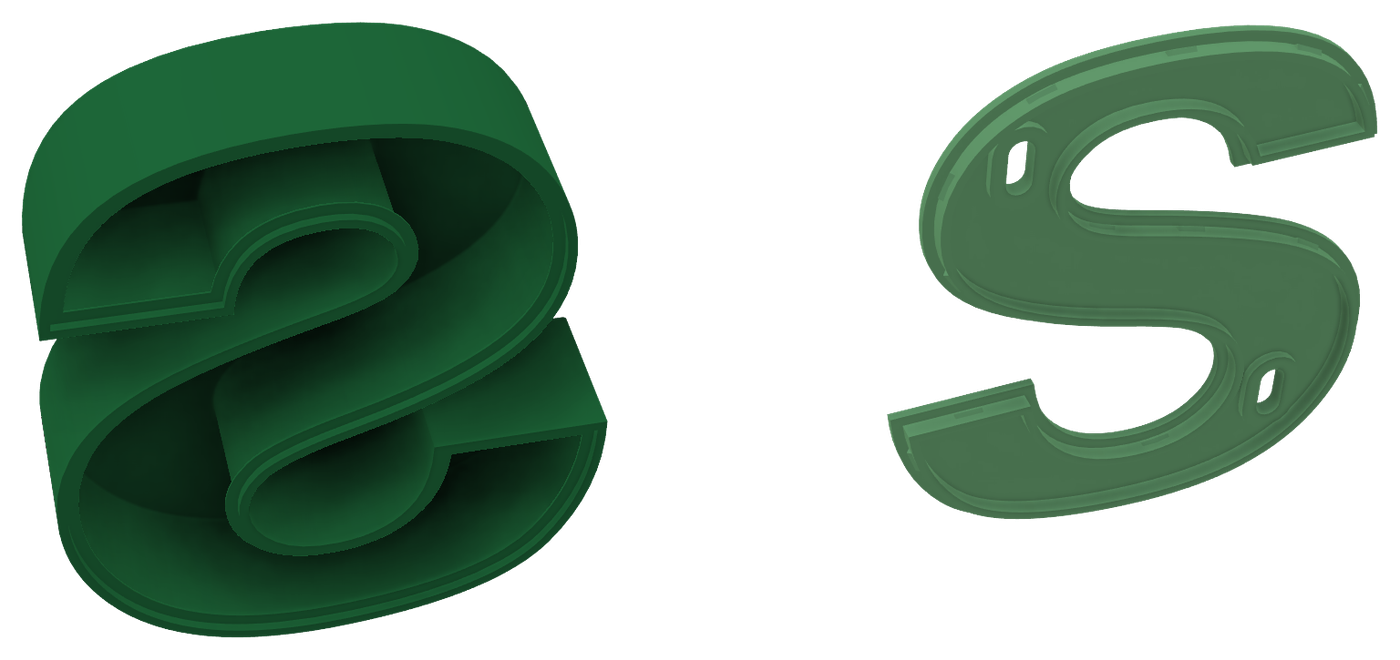
An open S shell next to its lid, seen from the inside

Designed to print and to fit

  • Ledge with a 45° slope: stops the lid and catches the snap bumps.
  • Lid clearance you choose (0.2 mm by default).
  • Optional chamfer or fillet on the face edge.
  • Inset lid flush with the back, or a cap lid over the whole back.
  • A small fit-test piece to tune clearance and snap on your printer.
Cross-section of a letter showing walls, ledge, lid, rib and a screw boss

How it works

Inside Fusion, in a design with history turned on (Assembly or Hybrid).

  1. Create Letters

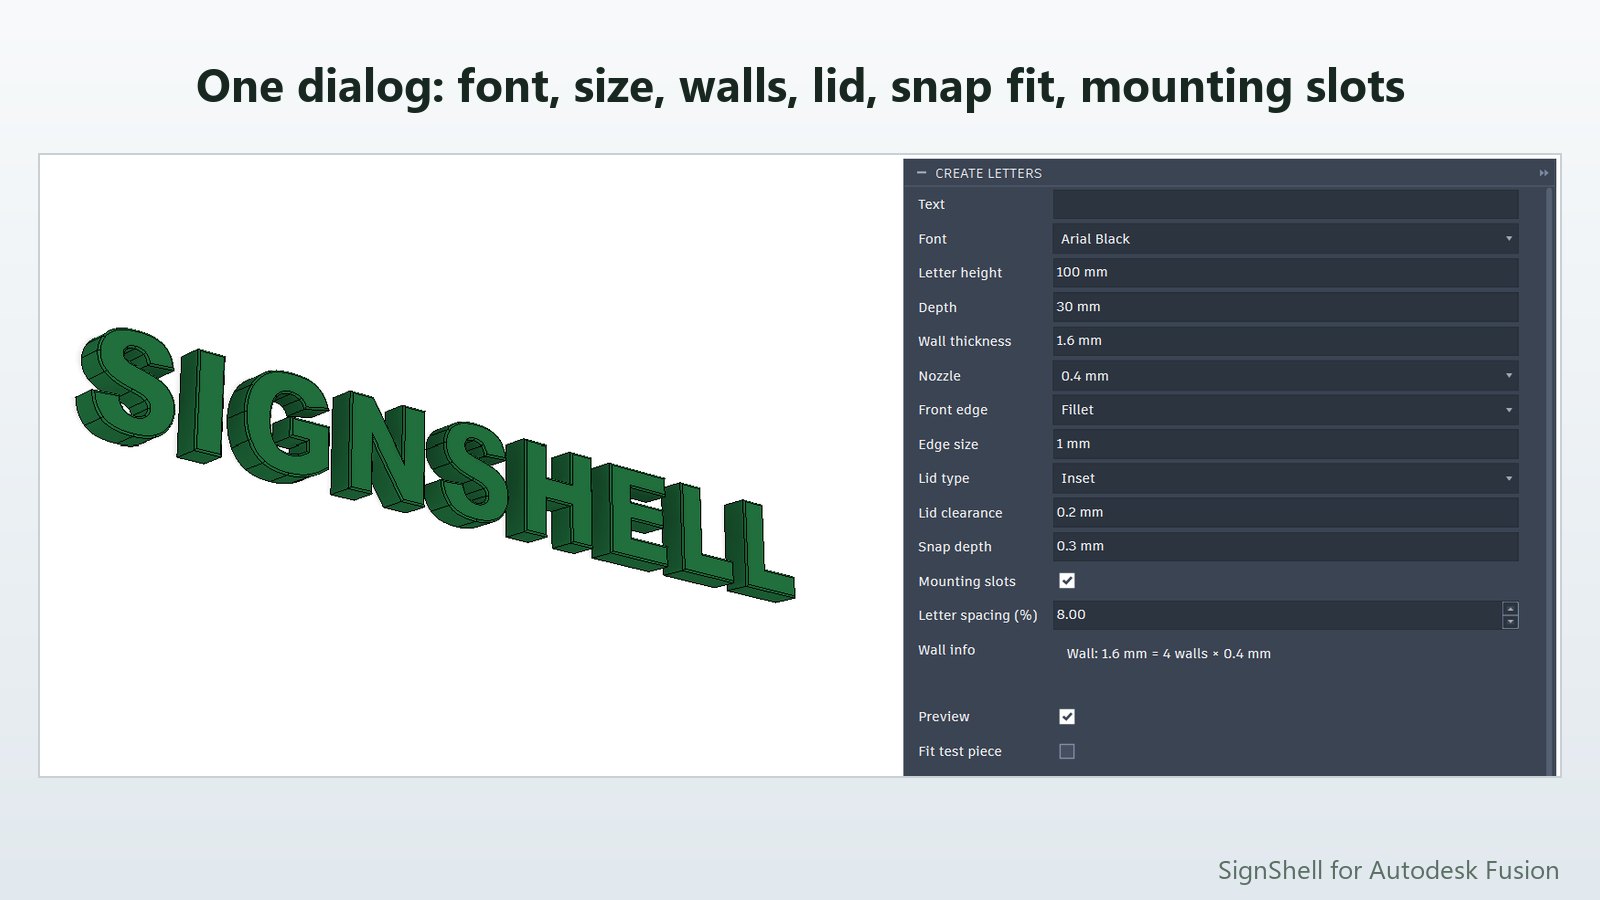
    Solid → Create → Create Letters. Type the text, choose font, height, depth and wall. The letters preview live.

  2. Report & Export

    Utilities → Add-Ins → Report & Export. Pick a material and a folder; get one file per letter and part.

  3. Print and mount

    Shells face down, lids flat. Screw the lids to the wall and click the letters on.

The Create Letters dialog in Fusion next to a sign
The Create Letters dialog.
The Report and Export dialog with mass, price and time per letter
Material, cost and print time before you print.

Get SignShell

SignShell is coming to the Autodesk App Store. This page will link to the listing as soon as it is live.

Price
USD 8.99, one-time purchase
Requires
Autodesk Fusion on Windows (64-bit)
Works in
Parametric Assembly and Hybrid designs
Account
None. No internet connection or licence key needed.

Questions, support, custom signs

info@senseoflayers.com

Write an e-mail

Questions

Which fonts can I use?

Any font installed on your computer that Fusion can use for sketch text. If a font lacks a character of your text, the dialog tells you before you start. Bold fonts work best; very thin strokes are made solid and listed in a message.

Does it work on a Mac?

Version 1.0 is for Windows. macOS support is planned once it has been tested on a Mac.

What printer settings do I need?

Any FDM printer. Print the shells face down and the lids flat side down, without supports. Two or more perimeters are recommended; the infill hardly matters because the walls are thin.

The lid is too loose or too tight.

Print the fit-test piece and adjust Snap depth (how firmly the lid clicks) or Lid clearance (how easily it goes in) in steps of 0.1 mm.